Sadly last weekend The Little Balcony was packed up and taken to a new location. Our current London flat was sold, which we had been planning for a whole and
in a very mad last minute rush, due to a last minute change, we moved to a new
rented London flat, which unfortunately does not have a garden or a balcony, as I had
hoped.
During the move, I had to get rid of all the vegetable plants, which
included the last of the Tomatoes, Chilies and Courgettes; luckily it was
coming to the end of the session so these were ready to be thrown away.
Otherwise along with the Herbs, the Brussels Sprout plant, which is still
growing away and the Strawberry plants, these were all taken to my mum’s house up north in Chester, which will be
their new home.
I am a little sad about this, as I won't be able to plant anything new next year, but it will give me time to start on the cook book, which I've been trying to get off the ground for the last couple of years. Hopefully we will be moving somewhere new in about six months and a garden/balcony is high on my list.
Having said that I did manage to keep a few plants, which hopefully will survive indoors on
the kitchen windowsill, I have a Lavender plant, the Vietnamese Coriander
plant, a Parsley plant and two Chili plants, which are still flowering and then all the other house plants.
Showing posts with label Cook Book. Show all posts
Showing posts with label Cook Book. Show all posts
Friday, 5 October 2012
Wednesday, 16 May 2012
Linguine & Chargrilled Veg in a Passata Sauce
1 Pepper (sweet)
1 Courgette - sliced with a potato peeler
1 tbsp of Chili Oil
1 Jar of Roasted Passata Sauce (see Recipe)
1 Large handful of Linguine Pasta
Salt & Pepper to season
Heat a griddle and add the Chili Oil, cut the pepper into large slices and grate the Courgette lengthways, to create large slices. Add these to the oil once smoking and cook till they are tender and brown. Remove and place to kitchen towel to drain excess oil and leave to cool.
I've used Linguine pasta, but any pasta will do. Place the pasta into a pot of salty water and cook as directed, for the Linguine I tend to snap this in half, as I don't like the pasta too long. Once cooked drain and run through cold water.
Add the Roasted Passata Sauce to a large pan and heat slowly over a medium heat, after a few minutes and when the sauce beings to bubble, add the Courgettes and Peppers (sweet) which can cut into smaller pieces, to the sauce, warm for a few minutes and then add the pasta, season with salt and pepper as required. Once everything is boiling away and heated through, pour into a large bowl and enjoy.
As a side dish, why not try my Homemade Chili and Garlic Bread:
Slices of French bread
Butter
Chopped Garlic
Chopped Chili
Dried or Fresh chopped Mixed Herbs
Salt & Pepper to season
This is very simple to make and you can make as much or as little as you like, mix the butter, garlic, chili and mixed herbs together to make a paste, then season as required and then spread onto the French bread, which has been cut into circular slices. Place on a baking tray and cook in the oven until brown.
Another great recipe for the Cook Book.
1 Courgette - sliced with a potato peeler
1 tbsp of Chili Oil
1 Jar of Roasted Passata Sauce (see Recipe)
1 Large handful of Linguine Pasta
Salt & Pepper to season
Heat a griddle and add the Chili Oil, cut the pepper into large slices and grate the Courgette lengthways, to create large slices. Add these to the oil once smoking and cook till they are tender and brown. Remove and place to kitchen towel to drain excess oil and leave to cool.
I've used Linguine pasta, but any pasta will do. Place the pasta into a pot of salty water and cook as directed, for the Linguine I tend to snap this in half, as I don't like the pasta too long. Once cooked drain and run through cold water.
Add the Roasted Passata Sauce to a large pan and heat slowly over a medium heat, after a few minutes and when the sauce beings to bubble, add the Courgettes and Peppers (sweet) which can cut into smaller pieces, to the sauce, warm for a few minutes and then add the pasta, season with salt and pepper as required. Once everything is boiling away and heated through, pour into a large bowl and enjoy.
As a side dish, why not try my Homemade Chili and Garlic Bread:
Slices of French bread
Butter
Chopped Garlic
Chopped Chili
Dried or Fresh chopped Mixed Herbs
Salt & Pepper to season
This is very simple to make and you can make as much or as little as you like, mix the butter, garlic, chili and mixed herbs together to make a paste, then season as required and then spread onto the French bread, which has been cut into circular slices. Place on a baking tray and cook in the oven until brown.
Another great recipe for the Cook Book.
Friday, 3 February 2012
Preserves: Roasted Tomato Passata
Last year I grew a lot of Tomatoes, so I decided to create some Tomato Passata. I've never done this before, so after some research on the internet, including watching a few cooking demo videos, I decided to use the recipe from the book 'Preserves: River Cottage Handbook No2', which I'd recently bought.
This Roasted Tomato Passata recipe makes 2x 500ml Jars:
2kg Ripe Tomatoes
200g Shallots, peeled and thinly sliced
3-4 Garlic Cloves, peeled and thinly sliced
A few Rosemary, Thyme, Basil or Oregano sprigs
1tsp Salt
1/2 tsp Ground Black Pepper
1tsp Sugar
50ml Olive, Sunflower or Rapeseed Oil
Pre-heat oven to 180c / gas mark 4
Firstly cut all the tomatoes in half, place them cut side up in a single layer in a large pot. Then scatter the shallots, garlic, herbs, salt, pepper, sugar and oil. This then needs to be roasted for 1 hour or until everything is well softened. Remove the pot from the oven and rub the entire content through a nylon slieve or puree with a passata machine or mouli.
 Photo: Laura Lunt Date: September 2011
Make sure you have the hot sterilised jars ready, put the tomato puree into a sauce pan and bring it to a boil, once its boiled pour into the jars, filling them to the brim and seal, depending on the jars.
Stand the jars in a large pan with a towel at the bottom and over everything with warm water, bring to a simmering point (which is 88c) over a period of 25 minutes, using a thermometer will help here and then simmer for 10 minutes.
 Photo: Laura Lunt Date: September 2011
After simmering, remove the jars from the pan and stand them on a wooden surface or folded towel. Leave undisturbed until cold, then check the seal. These can be stored and used within 12 months. Once opened, refrigerate and use within a few days.
 Photo: Laura Lunt Date: September 2011
This Roasted Tomato Passata recipe makes 2x 500ml Jars:
2kg Ripe Tomatoes
200g Shallots, peeled and thinly sliced
3-4 Garlic Cloves, peeled and thinly sliced
A few Rosemary, Thyme, Basil or Oregano sprigs
1tsp Salt
1/2 tsp Ground Black Pepper
1tsp Sugar
50ml Olive, Sunflower or Rapeseed Oil
Pre-heat oven to 180c / gas mark 4
Firstly cut all the tomatoes in half, place them cut side up in a single layer in a large pot. Then scatter the shallots, garlic, herbs, salt, pepper, sugar and oil. This then needs to be roasted for 1 hour or until everything is well softened. Remove the pot from the oven and rub the entire content through a nylon slieve or puree with a passata machine or mouli.

Make sure you have the hot sterilised jars ready, put the tomato puree into a sauce pan and bring it to a boil, once its boiled pour into the jars, filling them to the brim and seal, depending on the jars.
Stand the jars in a large pan with a towel at the bottom and over everything with warm water, bring to a simmering point (which is 88c) over a period of 25 minutes, using a thermometer will help here and then simmer for 10 minutes.

After simmering, remove the jars from the pan and stand them on a wooden surface or folded towel. Leave undisturbed until cold, then check the seal. These can be stored and used within 12 months. Once opened, refrigerate and use within a few days.

Wednesday, 18 January 2012
The Little Balcony 2012
As regular readers of The Little Balcony will know, I started documenting the coming and goings of balcony growing life through my blog, in early June of last year. Our new London flat's balcony was a great little experiment to try and see what could and could not grow, having only ever had a very tiny balcony before this one, I through myself into this and six months on, I have learned so much more than I ever through I would.
The New Year is now upon us and this year I want to take everything I learned from last year and make the balcony even better, this year. Planning has already begun, with a stock check of seeds and I've been keeping a close eye on the Onions, Garlic, Cabbage, Carrots and Leeks which have been overwintered from late last year, along with the Strawberry Runners. I would have preferred a colder winter, maybe even some snow to help everything a long, but I keep peeking outside and they all seem to be doing well regardless.
Vegetable sowing and growing plans are in the early stages, while doing the seed stock check; I've also been putting a growing chart together for what I have also, so I'm able to plan out the best way to fit all of the different crops into the balcony. I'm not giving any hints away as of yet, but there will be some second goes at vegetables that didn't grow very well last year and a few new ones that I've been desperate it try out.
As for the cook book, I really must say that last year I didn't do a lot on this, as I wanted to concentrate more on the balcony and seeing what I could grow. Having taken the time to do this, as well as using all the vegetables grown to test out recipes, I'm now ready to start putting the first draft together and I'll hopefully have the book complete soon.
The New Year is now upon us and this year I want to take everything I learned from last year and make the balcony even better, this year. Planning has already begun, with a stock check of seeds and I've been keeping a close eye on the Onions, Garlic, Cabbage, Carrots and Leeks which have been overwintered from late last year, along with the Strawberry Runners. I would have preferred a colder winter, maybe even some snow to help everything a long, but I keep peeking outside and they all seem to be doing well regardless.
Vegetable sowing and growing plans are in the early stages, while doing the seed stock check; I've also been putting a growing chart together for what I have also, so I'm able to plan out the best way to fit all of the different crops into the balcony. I'm not giving any hints away as of yet, but there will be some second goes at vegetables that didn't grow very well last year and a few new ones that I've been desperate it try out.
As for the cook book, I really must say that last year I didn't do a lot on this, as I wanted to concentrate more on the balcony and seeing what I could grow. Having taken the time to do this, as well as using all the vegetables grown to test out recipes, I'm now ready to start putting the first draft together and I'll hopefully have the book complete soon.
Tuesday, 1 November 2011
My Sisters Spicy Tomato Soup
When I told my family about the
Cook Book I wanted to create, they started to come up with a few recipes I
could use, with ingredients we all grow in our gardens. My twin sister Lisa
came up with this Spicy Tomato Soup recipe, which she loves to make and as we
all always have a ton of Tomatoes, this is idea for the book.
I did have to tweak the recipe a little, swopping chicken stock for vegetable and chorizo sausage for kosher sausage, as my boyfriend is Jewish and we keep a kosher home, but these were just small changes and I'm sure it'll taste just as good.
I did have to tweak the recipe a little, swopping chicken stock for vegetable and chorizo sausage for kosher sausage, as my boyfriend is Jewish and we keep a kosher home, but these were just small changes and I'm sure it'll taste just as good.

For the soup I firstly added
the olive oil, Onion, Garlic, Ginger & Chili and heated till they became
soft, stirring occasionally. The cumin and sausage were then added and cooked
for a minute or so, the Tomatoes, stock and salt & pepper were then added
and all brought to a boil. The mixture was then simmered for 20 minutes, taken
off the heat and left to cool over night. I then blitzed the ingredients to a
texture I wanted, poured into sealable bags and put into the freezer for a
later date. Alternatively this can be eaten and enjoyed straight away, with a
little bit of cream if need be.

Spicy Tomato Soup
x12-15 Tomatoes
x1 Large Onion
x2 Garlic Cloves
x2 tsp Ginger
x1 tsp Chili Peppers
half tsp Cumin
2 & half Cups Vegetable Stock or about 450 ml
x3 tbsp Olive Oil
Chorizo Sausage or Kosher Sausage
Salt & Pepper
(could add bell peppers too if want)
Cream if needed
x12-15 Tomatoes
x1 Large Onion
x2 Garlic Cloves
x2 tsp Ginger
x1 tsp Chili Peppers
half tsp Cumin
2 & half Cups Vegetable Stock or about 450 ml
x3 tbsp Olive Oil
Chorizo Sausage or Kosher Sausage
Salt & Pepper
(could add bell peppers too if want)
Cream if needed
Pour & Store Bags
Thursday, 22 September 2011
More Harvesting
Its been a busy time for 'The Little Balcony', I've been harvesting even more vegetables including both Gardeners Delight and Moneymaker Tomatoes, Red Chilies including Inferno and Thai Dragon and all the Baby Sweetcorn, which I may have left a little too late to pick as the kernels are very hard, but I may just try to make popcorn out of this, if not the birds will be getting a treat.
 Photo: Laura Lunt Date: Sept 2011
These plenty more Tomatoes currently rippening away outside, which I'll be turning into a great sauce to store away and use over the winter months, as well as some great chutney and I have a great recipe for chili jam which I'll be using the Chilies for.
Of course all the recipes will be in the cook book.
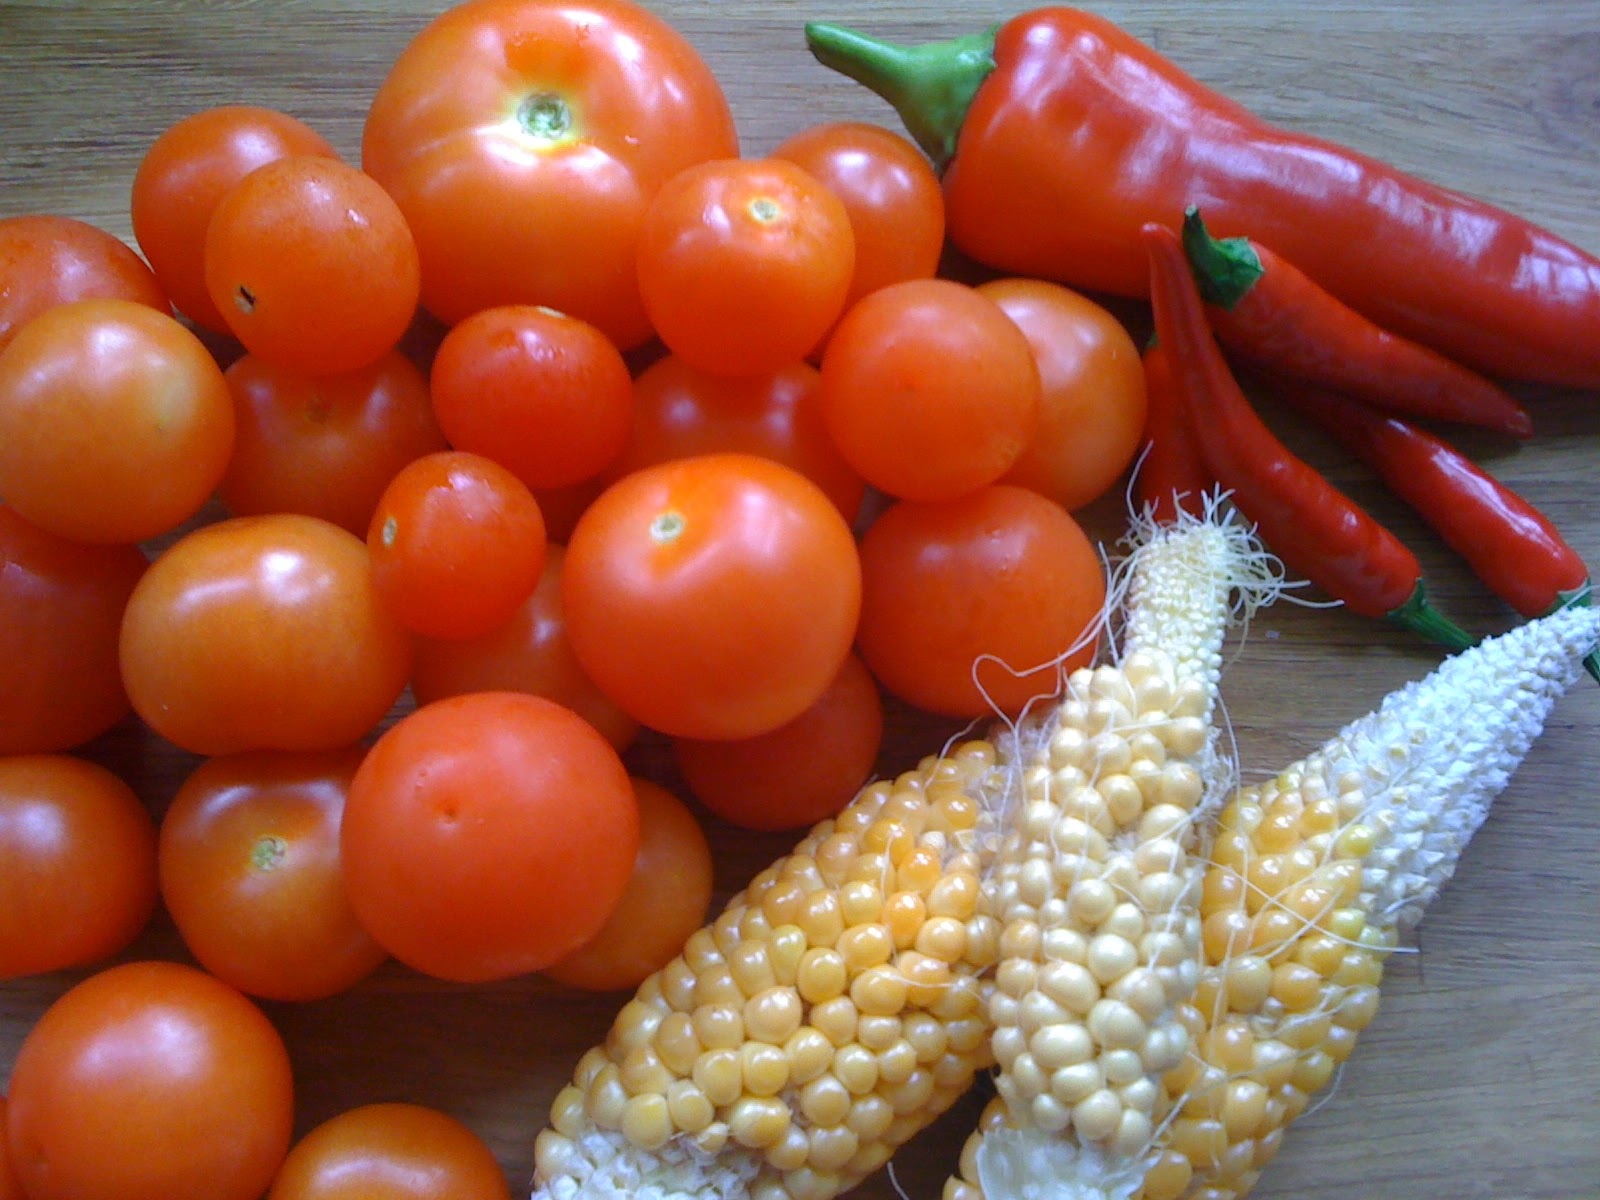
These plenty more Tomatoes currently rippening away outside, which I'll be turning into a great sauce to store away and use over the winter months, as well as some great chutney and I have a great recipe for chili jam which I'll be using the Chilies for.
Of course all the recipes will be in the cook book.
Friday, 29 July 2011
Follow My Blog
For those of you reading my blogs, please press the Join This Site button, to keep following the story of my cook book creation and how I've grown all the ingredients for the recipes.
Thursday, 21 July 2011
The Creation of the Cook Book
The idea behind The Little Balcony blog came from the idea that I wanted to create a cook book. I love cooking and I have so many recipes cut out of magazines, scribbled down ingredients from TV shows I've seen. Not to mention the small collections of cook books I already own, some of which hold some of my most favorite dishes, which I've adapted over the years to my own tast.
But also being a keen and not so adventurous vegetable gardener, usually only tomatoes, herbs, chili and peppers and the odd strawberry plant. I though I might see how hard it was to grow more exciting fruit and vegetables and use these in the recipes I had started to put together for the cook book, from the large selection I'd collected over the years and the many recipes my mother has taught me.
Having only a small balcony I knew this would be a challenge, but I started to buy the 'Grow Your Own' garden magazine, plus others, which sometimes come with free seeds, as well the RHS book 'Vegetables in a Small Garden' and I started to put a plan together to see which fruit and vegetables were suitable to grow in pots, planters and hanging baskets and this is how The Little Balcony blog and cook book started.
Now I can't take credit for the name, this came from my boyfriend Zac, but all the balcony garden planning and growing I have done, except the chilies. Having decided to create a book, I did a lot of research on creating your own book and remembered a friend had done this with a website called BLURB, I registered with them. I then spent sometime looking at other peoples designs on the site and decided I wanted to create a cook book of easy recipes that could be cooked any day of the week and would appeal to everybody.
Slowly I started to create a list of dishes and before I knew it I had nearly 40 recipes, ranging from starters to deserts as well as jams, dressings and drinks and all of which contain ingredients that I could grow on my balcony. I also started to develop a strong idea of how I visually saw the book. Now I'm not going to give too much away, but the ideas for the page designs slowly came to me, so from having an idea of what I wanted to appear on the pages I started to plan what I could grow and recorded this through this blog.
But also being a keen and not so adventurous vegetable gardener, usually only tomatoes, herbs, chili and peppers and the odd strawberry plant. I though I might see how hard it was to grow more exciting fruit and vegetables and use these in the recipes I had started to put together for the cook book, from the large selection I'd collected over the years and the many recipes my mother has taught me.
Having only a small balcony I knew this would be a challenge, but I started to buy the 'Grow Your Own' garden magazine, plus others, which sometimes come with free seeds, as well the RHS book 'Vegetables in a Small Garden' and I started to put a plan together to see which fruit and vegetables were suitable to grow in pots, planters and hanging baskets and this is how The Little Balcony blog and cook book started.
Now I can't take credit for the name, this came from my boyfriend Zac, but all the balcony garden planning and growing I have done, except the chilies. Having decided to create a book, I did a lot of research on creating your own book and remembered a friend had done this with a website called BLURB, I registered with them. I then spent sometime looking at other peoples designs on the site and decided I wanted to create a cook book of easy recipes that could be cooked any day of the week and would appeal to everybody.
Slowly I started to create a list of dishes and before I knew it I had nearly 40 recipes, ranging from starters to deserts as well as jams, dressings and drinks and all of which contain ingredients that I could grow on my balcony. I also started to develop a strong idea of how I visually saw the book. Now I'm not going to give too much away, but the ideas for the page designs slowly came to me, so from having an idea of what I wanted to appear on the pages I started to plan what I could grow and recorded this through this blog.
Sunday, 12 June 2011
The Beginning of My Garden 2011
Gardening has been something I've been interested in and dabbling in for many years. Living in London I've found it very challenging, as many of the places I've lived in, mainly flats with small balconies, are not ideal for growing fruit and vegetables. But with a little imagination and some research, I've managed to grow many things in very small places, in tubs, pots and hanging baskets.
My inspiration for this years garden, came from my idea to create a cook book. I wanted to put together a book of my favorite recipes, simple dishes containing foods I love to eat and all of which contain the fruit and vegetables I love to grow in my garden or my Little Balcony.
I've created this blog to follow the creation of my first cook book 'The Little Balcony: Cook Book' and along with it, how I've grown the fruit and vegetables which will be used in these recipes.
My inspiration for this years garden, came from my idea to create a cook book. I wanted to put together a book of my favorite recipes, simple dishes containing foods I love to eat and all of which contain the fruit and vegetables I love to grow in my garden or my Little Balcony.
I've created this blog to follow the creation of my first cook book 'The Little Balcony: Cook Book' and along with it, how I've grown the fruit and vegetables which will be used in these recipes.


Subscribe to:
Posts (Atom)