Showing posts with label Chili. Show all posts

Thursday, 11 April 2013

Homemade Thai Chicken Noodle Soup

Its been a while, but here's a new recipe, last night I felt like being a little creative, and I'd been thinking about noodle soup since I smelt the sweet smell of my co-workers Pho soup at lunch yesterday, so I thought I'd make some of my own.

This is very simple and very quick to make, firstly I sliced the chicken, pepper sweet and mange tout beans into thin slices, in a large pan I heated the groundnut oil, once this started to smoke I added the chopped ingredients to the oil and gently stirred for a minute, then added the Thai 7 spice and cooked for a further few minutes, until you can see the chicken starting to cook and brown.

Having dissolved the vegetable stock pot in the hot water, this was then added to the pan, and turned down to a simmer level, the noodles were then added, I only had thin wheat noodles so I used these, but I have used rice noodles before, as well as the chopped and de-seeded chilli for extra heat and flavor and some black pepper to taste, this was then left to simmer for 15-20mins on the low heat.

Near to the end of cooking when the chicken looks like its completely cooked and the mixture is simmering away, add the light Soya sauce to taste.

This can then to eaten straightaway or you can turned off the heat, allow this too cool, reheat and eat another day.

                                                   Photo: Laura Lunt  Date: April 2014

x1 Chicken Breast
x1 Portion of Rice or Thin Wheat Noodles
x1 Red Pepper Sweet
A Hand Full of Mange Tout Beans
x1 Medium/Large Mild Chilli
x2/3 tsps Thai 7 Spice
x1 Vegetable Stock Pot
500ml Hot Water
x1 tbsp Groundnut Oil
Black Pepper
Light Soya Sauce

Friday, 1 February 2013

Weekend Harvest - Sept 2012

Early September last year, I was very busy on the balcony, harvesting a few of my crops and storing them away. Firstly the two varieties of the Chilies we had been growing were ready to pick, the 'Inferno Chilli' which have stayed green for a while and don't seem to want to turn red, were picked and then the red 'Hot Chilies', which are a cute small size.


Also picked were the last of the Peppers (sweet), which have grown a lot better this year and a lot bigger than the previous, they seem to have really enjoyed this year on the balcony.


The two Chilli varieties were washed placed in a bag, labeled and put in the freezer for later use and the Peppers (sweet) were also washed, but put in the fridge instead for instant use, they tasted great in a stir fry later that week.

Friday, 10 August 2012

Chilies Planted Up & Growing

This years Chilli plants have been planted up in their final place for a few weeks now and are now sitting comfortably on the Livingroom windowsill. We have one Thai Dragon Chili plant, one Hot Chili Pepper 'Apache' plant (store bought) and one Inferno Chili plant. The non-store bought Chili plants were grown from seeds from last years plants, and as stated in an earlier blog, I'm not sure what these will come out like, due to the pollen of the plants being mixed together, but I can't wait to see how they grow and also how hot they may be.


                                                                  Photo: Laura Lunt  Date: June 2012

I've also planted and finally managed to germinate some Cayenne Pepper Chili plants, which I have three and also the Hotscotch (Hot) Chili Pepper plants (no photos), again I have three of, these are all nicely planted in two big pots and sitting on the windowsill of the spare bedroom, they get great late evening sun there.


                                                                     Photo: Laura Lunt  Date: August 2012

At the moment the three in the livingroom are growing really well and already have a lot of flower buds on them, which hopefully will turn into lots and lots of Chilies and then I can get on with another year of making Chili Jam and my lovely boyfriend Zac, can test out a few more versions of his Hot Sauce.

                                                                     Photo: Laura Lunt  Date: August 2012
 

Wednesday, 16 May 2012

Linguine & Chargrilled Veg in a Passata Sauce

1 Pepper (sweet)
1 Courgette - sliced with a potato peeler
1 tbsp of Chili Oil
1 Jar of Roasted Passata Sauce (see Recipe)
1 Large handful of Linguine Pasta
Salt & Pepper to season

Heat a griddle and add the Chili Oil, cut the pepper into large slices and grate the Courgette lengthways, to create large slices. Add these to the oil once smoking and cook till they are tender and brown. Remove and place to kitchen towel to drain excess oil and leave to cool.

I've used Linguine pasta, but any pasta will do. Place the pasta into a pot of salty water and cook as directed, for the Linguine I tend to snap this in half, as I don't like the pasta too long. Once cooked drain and run through cold water.

Add the Roasted Passata Sauce to a large pan and heat slowly over a medium heat, after a few minutes and when the sauce beings to bubble, add the Courgettes and Peppers (sweet) which can cut into smaller pieces, to the sauce, warm for a few minutes and then add the pasta, season with salt and pepper as required. Once everything is boiling away and heated through, pour into a large bowl and enjoy.

As a side dish, why not try my Homemade Chili and Garlic Bread:

Slices of French bread
Butter
Chopped Garlic
Chopped Chili
Dried or Fresh chopped Mixed Herbs
Salt & Pepper to season

This is very simple to make and you can make as much or as little as you like, mix the butter, garlic, chili and mixed herbs together to make a paste, then season as required and then spread onto the French bread, which has been cut into circular slices. Place on a baking tray and cook in the oven until brown.

Another great recipe for the Cook Book.

Tuesday, 1 May 2012

Blooming Hot Sauce

As mentioned on my TLB facebook page recently, I've started to put a plan together for selling a few jars of the preserves I've been making, such as Chili Jam, Tomato Chutney and even the Passata Sauce and to my surprise my boyfriend, Zac, suddenly decided he wanted to make and sell Hot Sauce.

For those of you who have read about the Chili plants I bought for him last year, we ended up growing quiet a large amount of chilies and we found it really hard to decide what to do with them. But making Hot Sauce now seems like a great idea, Zac found a really easy recipe online and from this he adapted the recipe to fit the types of chilies he bought (at the moment our plants are very small), for his tester batch. He used x3 medium green chilies and x4 small Caribbean scotch bonnet Chilies.

I left him alone with the ingredients in the kitchen one Saturday afternoon and a couple of hours later we had a large amount of Hot Sauce, all bottles up and ready to test. Which we did the following day and I must say it was surprisingly tasty and really not that over powering in hotness, we love it so much we've been using it with everything.

                                                                        Photo: Laura Lunt  Date: 29 April 2012

This can only mean that test no.1 was very successful and once we've finished off this batch, it'll be onto the making of the next one.

Friday, 17 February 2012

The First Sow Of The Year

Over the recent snowy weekend, I started to sow my first batch of seeds of the year, which I always start at this time of the year (mid February). Having already sorted through all the seeds I've managed to collect, earlier in the month, I then got to prepping for this years vegetable sowing.

                                                       Photo: Laura Lunt  Date: February 2012

Tools
6cm Pots
Compost (peat free)
Spoon
Watering Can
Newspaper
Label Sticks / Pen
Seed Trays

As I only have a small balcony, seed sowing for me, usually happens on my dinning room table, which is covered with newspaper. Having selected the types of vegetables I wanted to grow (see picture & list below), I would have normally sown these into my propagator, into individual pods, but this year I have decided to sow the seeds into small 6cm pots, as I have a lot of different vegetables I'd like to sow.

I filled each pot with peat free compost, leaving a 1.5cm gap from the top, watered them and then added 5-7 seeds to each separate pot, making sure I added a label stick so I knew what was in each pot. A small layer of compost was then laid on top of the seeds and these were then placed into a seed tray. After all the seeds were sown, and they had been carefully placed in seed trays and then placed on a south-east facing windowsill, around 2cms of water was added to the trays, and has been carefully topped up when needed.

                                                       Photo: Laura Lunt  Date: February 2012

Vegetable Seeds
Tomatoes (x3 varieties) - Moneymaker / Gardeners Delight and Roma VF (Plum)
Chilies (x5 varieties) - Thai Dragon / Inferno / Tabasco / Pepper (Hot) Hotscotch and Pepper Cayenne
Peppers (sweet)
Parsnip Duchess F1
Brussels Sprout Evesham Special
Sweet Pea (Old Spice Mixed)
Aubergines Black Beauty Organic

Herb Seeds
Chives
Basil Sweet Genovese
Dill

I haven't covered these with any form of lid, as I'd like to see how they do without this, and as they are in the sunniest part of the flat, over a radiator, I'm sure it won't harm them. In fact, its now been a week since these have been sown and I already have Sprout and Sweet Pea seedlings appearing.

                                                                    Photo: Laura Lunt  Date: February 2012

The herb seeds were sown into re-useable herb pots, which my boyfriend bought last year. The pots were put through the dishwasher, before being used again. As with the vegetable seeds these were also filled with peat free compost, watered, seeds added and then filled with more compost, and then watered again.

                                                       Photo: Laura Lunt  Date: February

Now everything is happily sitting on the windowsill and I just have to wait for even more little seedlings to appear over the coming weeks and the sun to come out.

Friday, 10 February 2012

Chili & Pepper (Sweet) - Mystery Seeds?

It seems though I thought I'd be doing a great thing by saving my Chili and Pepper (sweet) seeds, it has been pointed out me to that these may not be exactly true to type, when it comes to sowing them. Some very good advice from a fellow UK Veg Garderners gardener has let me know that as a rule of thumb, different varieties of Chilies and Peppers (sweet) should either be planted at least four miles apart or they should be grown under insect proof nets, for the plants to produce seeds true to type.

I've planted my 'so called' Chili and Pepper (sweet) seeds under their original names but it seems, I may actually end up with very different varieties such as 'Thai Tabasco' or 'Inferno Dragon' and maybe even a not so cool Pepper (sweet).

I'm very excited about this, as I had no idea about the possibility of it happening, but everything is now planted and all's I have to do is just wait and see.


Wednesday, 1 February 2012

Collecting Chili & Pepper Seeds

In a bid to save on buying seeds or new plants, this year I've tried to save some seeds from a few plants I've grown. I've specifically planned to save those from my different Chili varieties and Pepper (Sweet) plants:

Thai Dragon Chili Seeds
Tabasco Seeds
Inferno Seeds
Pepper (sweet) Seeds

Saving these was very easy, for the Pepper (Sweet) when going to cooking these; I saved as many seeds as possible from inside the Pepper, placed them in a small open bowl, left them in a light but not sunny area and waited for them to dry out naturally. The same was done for the Chilies, but I did allow some of the Chilies to dry out naturally before de-seeding.

Drying out took a few days to a week, and they should stay the same natural light colour as they were inside the vegetable, I have done this before and by mistake placed in direct sun, to which the seeds burned and turned a dark brown colour, not good. Also, it is handy to label the bowls, I forgot to do this and ended up having to lick a seed to see if it was a Pepper or Chili seed, turned out to be Chili and it was very hot.

                                                                  Photo: Laura Lunt  Date: January 2012

I now have a lot of seeds collected and some will be sown for this year, which I should hopefully to doing very soon. For the rest, I've decided to create a little seed collection gift pack, which I'll be sending out to a few family members and friends, and hope they have fun growing them this year along with me.

Monday, 23 January 2012

Prep for the 2012 Balcony

One of my first planned jobs for the 2012 balcony garden, which I've been doing over the last two weeks, has been to create a list of all the seeds I've been collecting. These have either been bought or have come free in garden magazines.

I've collated them all into a handy excel growing chart (this does look better in excel), along with the last year of sowing, best sowing and planning out months and when to harvest, see chart below:


Hopefully the chart is going to come in very handy, when I start sowing seeds for the New Year and also in planning what I can grow over the months ahead. I'm hoping I can keep a steady supply of vegetables growing this year, as last year I only tended to sow a few things at the beginning of the year and then not a lot after that, until the Autumn / Winter months started.

Prep will soon start on sowing Aubergines, Peppers (sweet), Chili Peppers (Thai Dragon / Tabasco / Inferno), Sweet Peas and Tomatoes, once I've had a quick trip to the local garden centre for new compost and maybe a few more Leeks, though I already have a few overwintering at the moment, there may be room for a few more.

Tuesday, 1 November 2011

My Sisters Spicy Tomato Soup

When I told my family about the Cook Book I wanted to create, they started to come up with a few recipes I could use, with ingredients we all grow in our gardens. My twin sister Lisa came up with this Spicy Tomato Soup recipe, which she loves to make and as we all always have a ton of Tomatoes, this is idea for the book.

I did have to tweak the recipe a little, swopping chicken stock for vegetable and chorizo sausage for kosher sausage, as my boyfriend is Jewish and we keep a kosher home, but these were just small changes and I'm sure it'll taste just as good.
                                                       Photo: Laura Lunt  Date: Oct 2011

For the soup I firstly added the olive oil, Onion, Garlic, Ginger & Chili and heated till they became soft, stirring occasionally. The cumin and sausage were then added and cooked for a minute or so, the Tomatoes, stock and salt & pepper were then added and all brought to a boil. The mixture was then simmered for 20 minutes, taken off the heat and left to cool over night. I then blitzed the ingredients to a texture I wanted, poured into sealable bags and put into the freezer for a later date. Alternatively this can be eaten and enjoyed straight away, with a little bit of cream if need be.
                                                       Photo: Laura Lunt  Date: Oct 2011

Spicy Tomato Soup
x12-15 Tomatoes
x1 Large Onion
x2 Garlic Cloves
x2 tsp Ginger
x1 tsp Chili Peppers
half tsp Cumin
2 & half Cups Vegetable Stock or about 450 ml
x3 tbsp Olive Oil
Chorizo Sausage or Kosher Sausage
Salt & Pepper
(could add bell peppers too if want)
Cream if needed

Pour & Store Bags

Thursday, 27 October 2011

The Big Winter Clean Up

The Big Winter clean up has been going on for a few weeks now; I've just about stripped the balcony of all the plants I have been growing. My handy new Secateurs and Pruning Knife have been put to some good use, during this time.

The first to go was the Baby Sweetcorn stalks; these did get pulled out as soon as the Sweetcorn was picked. Moneymaker and Gardeners Delight Tomato plants, which were starting to look a bit on the dead side, along with the Courgette plants were next, I only ever got one Courgette in the end, but next year I'll hopefully get a better crop. After that went the Aubergine plants, now they did flower a lot but much to my disappointment, no much else, like the Courgettes I will have another go next year.

                                                          Photo: Laura Lunt  Date: Oct 2011

Other things done during the clean up included, repotting the Strawberry Runners which are now snug in the Mini Greenhouse and also potting up the Serrano Chili plant and Pepper (sweet) plant that I had in a shared tub hanging over the balcony, hopefully once it gets colder I can take these indoors and try to keep these for next year. The Pepper (Sweet) plants still have peppers on, which are just starting to turn red.

And last but not least the Mini Greenhouse has also gone up and it's now outside, not only does it contain the potted Strawberry Runners, but I've also potted up some Cabbage and Carrot seeds. The whole place has had a bit of a clean and alls I have to do now is cover up the Strawberry hanging baskets and a few of the other plants with fleece and we are ready for the snow, that’s if we get any this winter.

Sunday, 16 October 2011

Preserves: Infused Oils

Creating Oil Preserves has always been something I love to do, but this can be a very sensitive area, as I've read that flavored Oils should only be kept for a certain amount of time, so normally I only create small amounts that I use within a few days. Having recently purchased the book 'Preserves: River Cottage Handbook No.2', by Pam Corbin, I found some great tips and ways to keep Oils for longer, so I thought I'd try some.

One of the best ways to keep Oils longer is to make sure the bottles are sterilised, for this I added the bottles to a pan with lukewarm water in and slowly brought this to boiling point, once the water is boiling I removed this from the hob and left the bottles in the water till needed. This does take sometime, but another way to achieve this is to simple put the bottles in a dishwasher and wash as normal, once done leave to dry on a drainer for when you're ready add the Oil and flavor.

The Chili Oil with Black Peppercorns was my boyfriend Zac's idea and for this he decided to use his Thai Dragon Chilies, which he has been growing over the summer, but any Chilies are fine. We heated Extra Virgin Olive Oil up (as this was all we had Oliver Oil should really be used) to a simmering boil, added the Thai Dragon Chilies, with a cut through each chili and the Black Peppercorns into a bottle and then carefully poured the Oil into the jar using a funnel, locked the lid and left to cool down and infuse.

The Basil and Garlic Oil didn't require the Oil to be heated, so we placed three peeled whole Garlic Cloves and a small sprig of Basil into a bottle before funneling the Extra Virgin Olive Oil into the bottle; again this was closed and left to infuse.

I also had a small bottle which I normally use for creating small batches of flavored Oil, for this I added the leftover heated Oil to dried Chilies I had in the cupboard from last years Chili plants.

                                                                                   Photo: Laura Lunt  Date: Sept 2011

Thai Dragon Chili Oil with Black Peppercorns
x1 500ml Swing-Top Preserving Bottle
x3 Thai Dragon Chilies (fresh)
x10-12 Black Peppercorns
Olive Oil

Basil & Garlic Oil
x1 500ml Swing-Top Preserving Bottle
x3 Cloves of Garlic
x1 Small Sprig of Basil
Olive Oil

Chili Oil
x1 Small Bottle
x6 Small Chilies (dried)
Olive Oil

These should then be left to infuse for 14 days, sieved of there content, re-bottled and enjoyed, storing in a cool place and used within 6 months.

Thursday, 22 September 2011

Winter Veg - Arrived and Ready to Plant

All the Winter Vegetables I'm going to attempt to grow this year, have now arrived from Mr Fothergil's and as a little added bonus, they also sent me two free packets of seeds, which they do with every seed order, this is what I have:

                                                                       Photo: Laura Lunt  Date: Sept 2011

Early Purple Wright Garlic x2 buds
Radar Onion Sets x250g
Cabbage Advantage F1 Seeds x100

Free Seeds: Pepper (hot) Hotscotch & Mimulus (extra choice mixed)

I'm looking forward to planting these all out in the next couple of months, which will hopefully mean I'll have some great early Vegetables at the beginning of next Spring.

More Harvesting

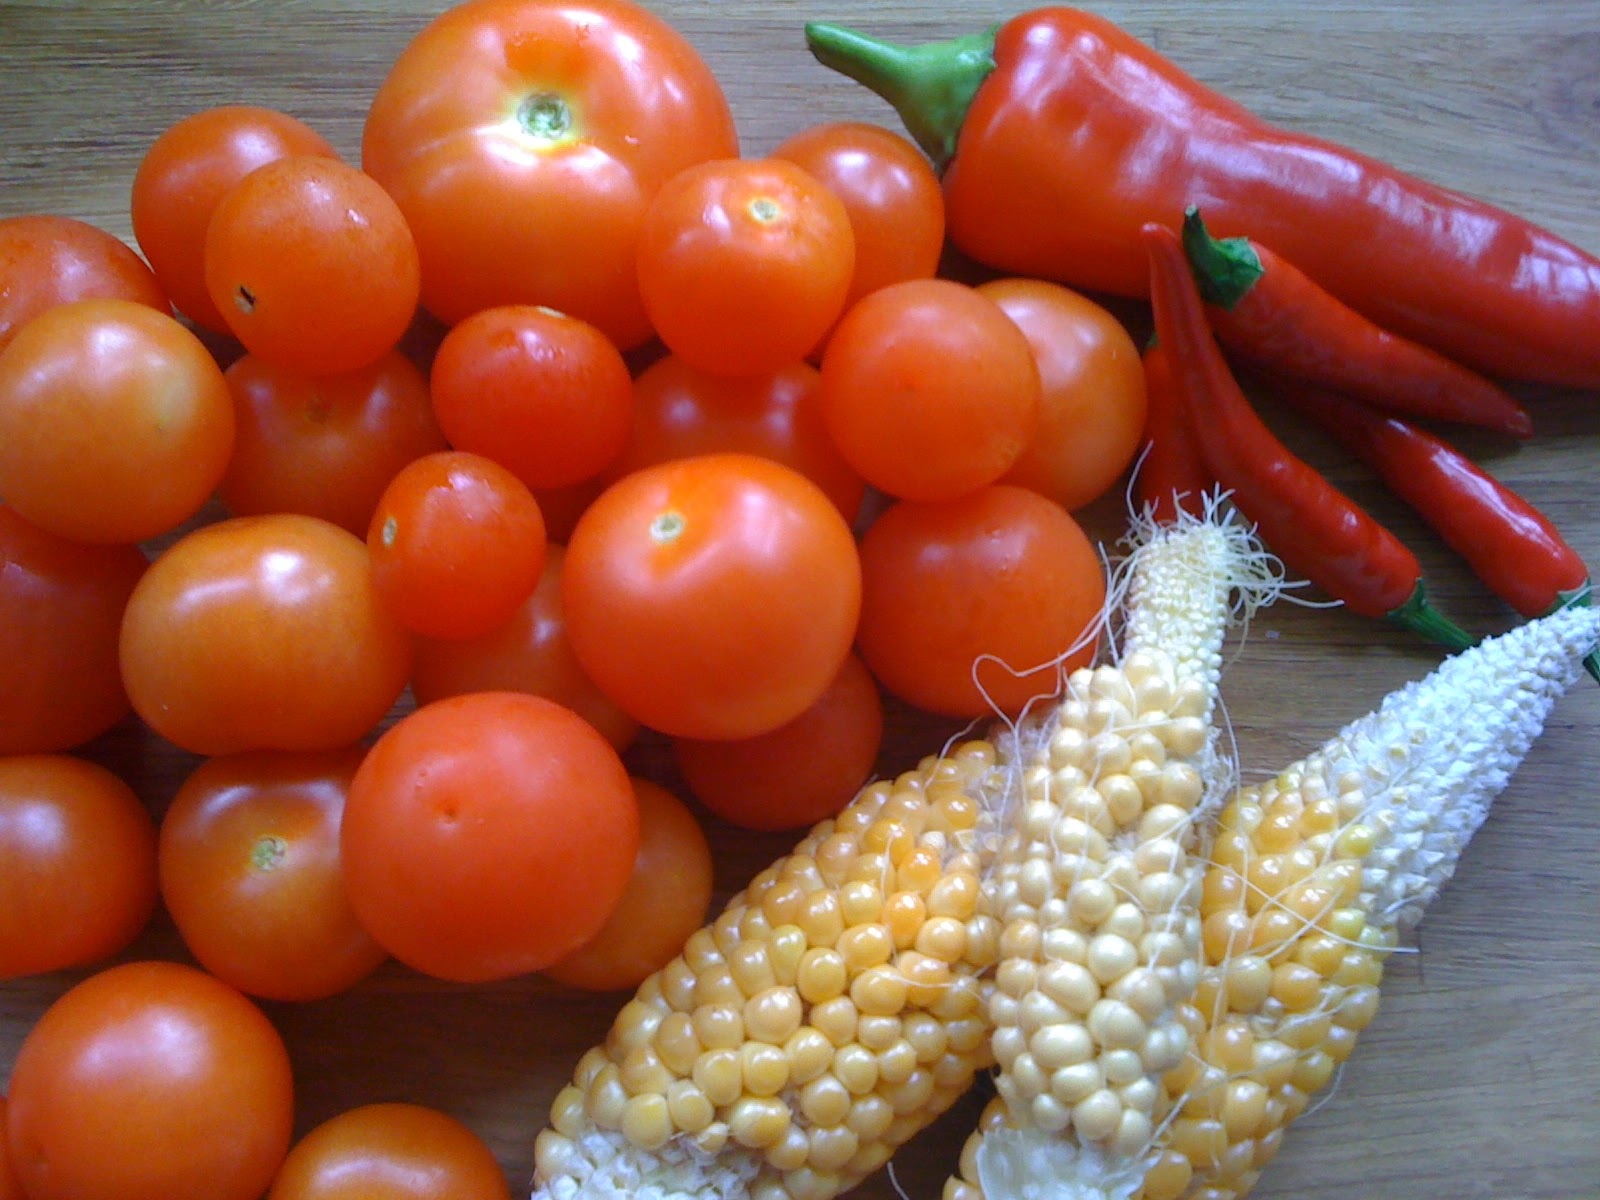
Its been a busy time for 'The Little Balcony', I've been harvesting even more vegetables including both Gardeners Delight and Moneymaker Tomatoes, Red Chilies including Inferno and Thai Dragon and all the Baby Sweetcorn, which I may have left a little too late to pick as the kernels are very hard, but I may just try to make popcorn out of this, if not the birds will be getting a treat.


                                                          Photo: Laura Lunt  Date: Sept 2011

These plenty more Tomatoes currently rippening away outside, which I'll be turning into a great sauce to store away and use over the winter months, as well as some great chutney and I have a great recipe for chili jam which I'll be using the Chilies for.

Of course all the recipes will be in the cook book.

Wednesday, 22 June 2011

Chili Plant Madness

My boyfriend, Zac and I started to grow Chili plants last year, neither of us had ever grown these before, but as I started to prepare my other seeds, Zac decided he wanted to grow something also, so off we went to the local garden centre and as soon he spotted the Chili section, he decided that was his thing.

This year, we have grown Serrano Chilies from seeds, which a local Mexican restaurant were giving away and I also ordered the Chili Plant Collection from Thompson and Morgan which contained two plants, of each of the three fiery varieties Tabasco, Inferno and Thai Dragon.

                                                                       Photo: Laura Lunt  Date: July 2011

The Serrano seeds were planted in the propagator in late February, along with other seeds and were moved into larger pots once they germinated and reached 5cm to 6cm tall. As with the other plants they were hardened off, outside for around two weeks. Once the warmer summer days started they were planted out into larger pots and planters.

                                                                               Photo: Laura Lunt   Date: July 2011

The Chili Plant Collection arrived as small plants in late May; these were planted into a large trough with starter compost and are currently sitting on a south-east facing windowsill. Now in Mid June, the first flowers are beginning to appear and I'm looking forward to our first batch of Chili's for my famous Chili Jam recipe and our favorite Chinese / Thai dishes.